

How to Use Google Calendar to Organize Your Semester
August 18, 2026
|
by Emma Comparato
Do you ever feel overwhelmed by the number of classes and assignments you have to complete? Maybe you’ve found it difficult to organize your schedule or routine? Or you’re wondering how you can manage your schedule in a fun way?
If you can relate, then I have a solution for you! Throughout college, I’ve been looking for ways to optimize my time and schedule. Having an organized schedule makes me feel more put-together. When juggling part-time work and academics, life can become quite hectic, especially during the school year. I tried Google Calendar for the first time during my freshman year and never went back. Once you understand the calendar’s tips and tricks, you’ll see why so many students love using it.

Setting Up the Semester
1.
The first step in creating a Google Calendar is to understand your schedule. This may seem obvious, but you should know what days and times you have classes, work, workouts, or appointments. You can easily create a new calendar for each subject in your semester.
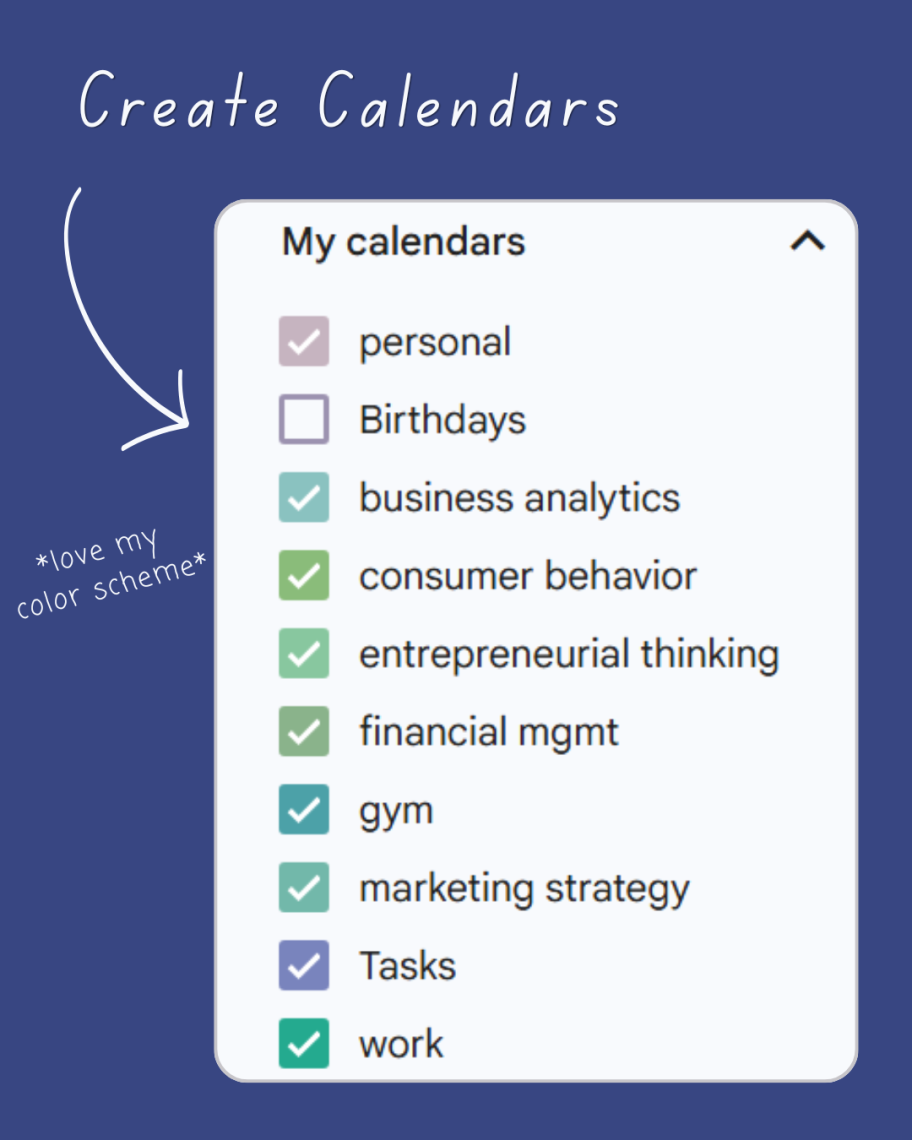
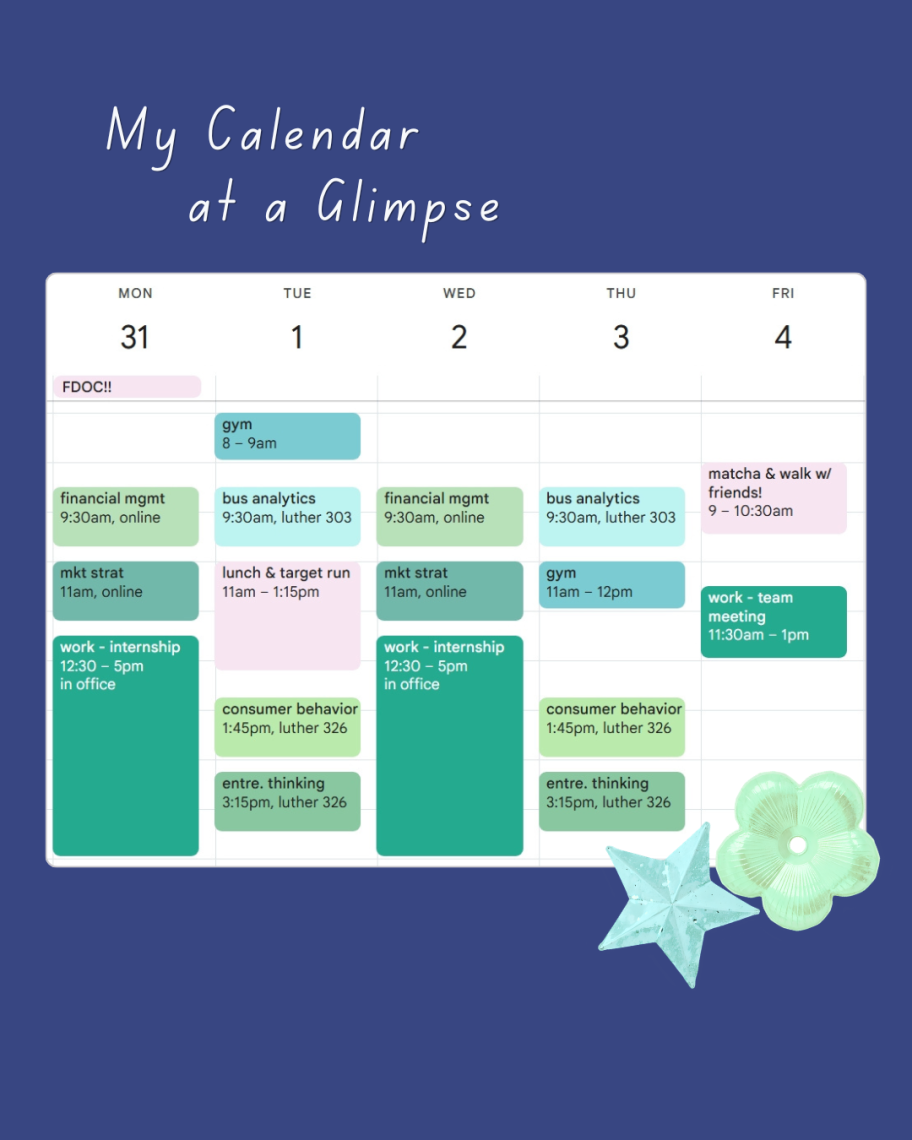
To start, use the plus button next to “other calendars” to make a “new calendar” for each class. From here, you can add anything you would like to have on your schedule! Plus, you can customize their colors, which is my favorite part. For example, I have each class I’m taking along with personal appointments, tasks, gym, and work.
I use separate calendars for each class and aspect of my life because I feel it helps me stay more organized. Seeing my whole semester makes it easier to stay consistent, too. I love the color-changing feature to make everything look aesthetically pleasing.
2.
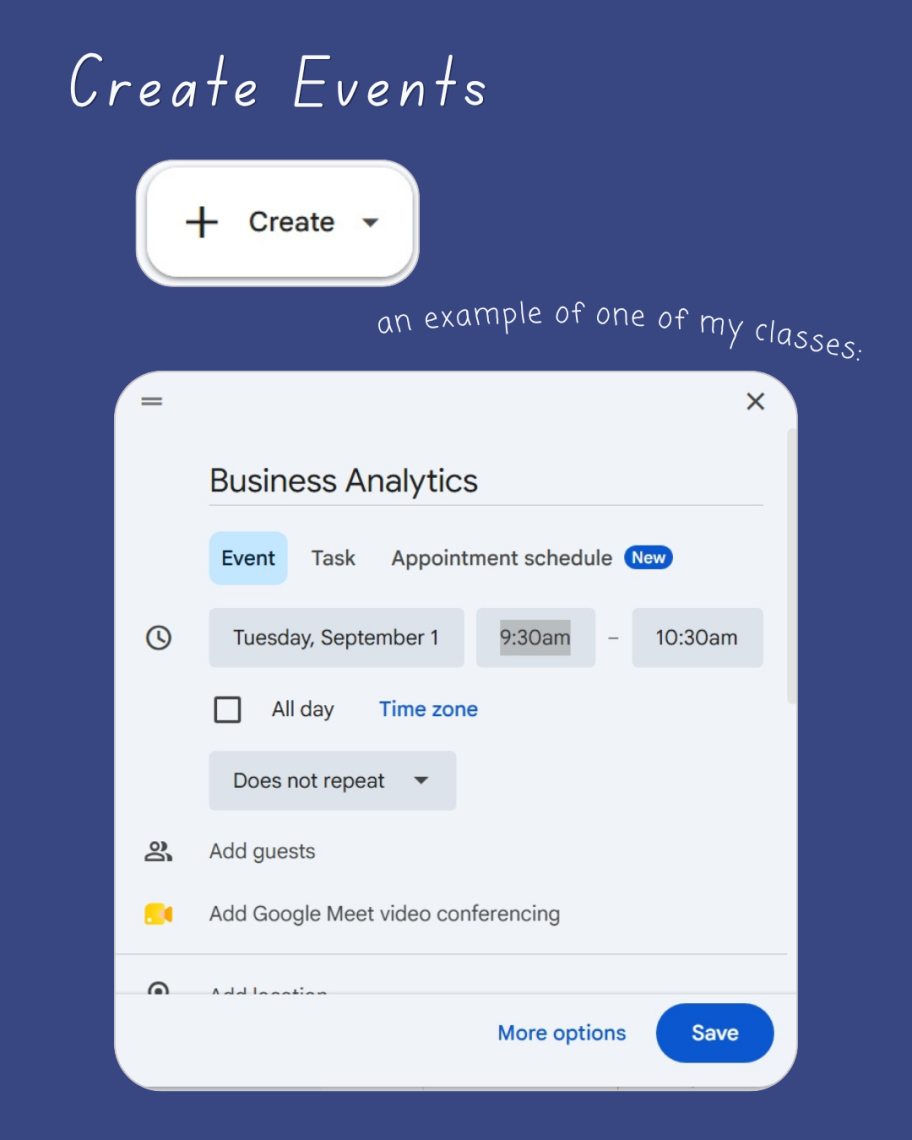
Now that you have your calendars made, you can add them as events in your schedule. The “create” button helps you add an event directly into your schedule. You can choose the date, time, location, and subject in the same action.
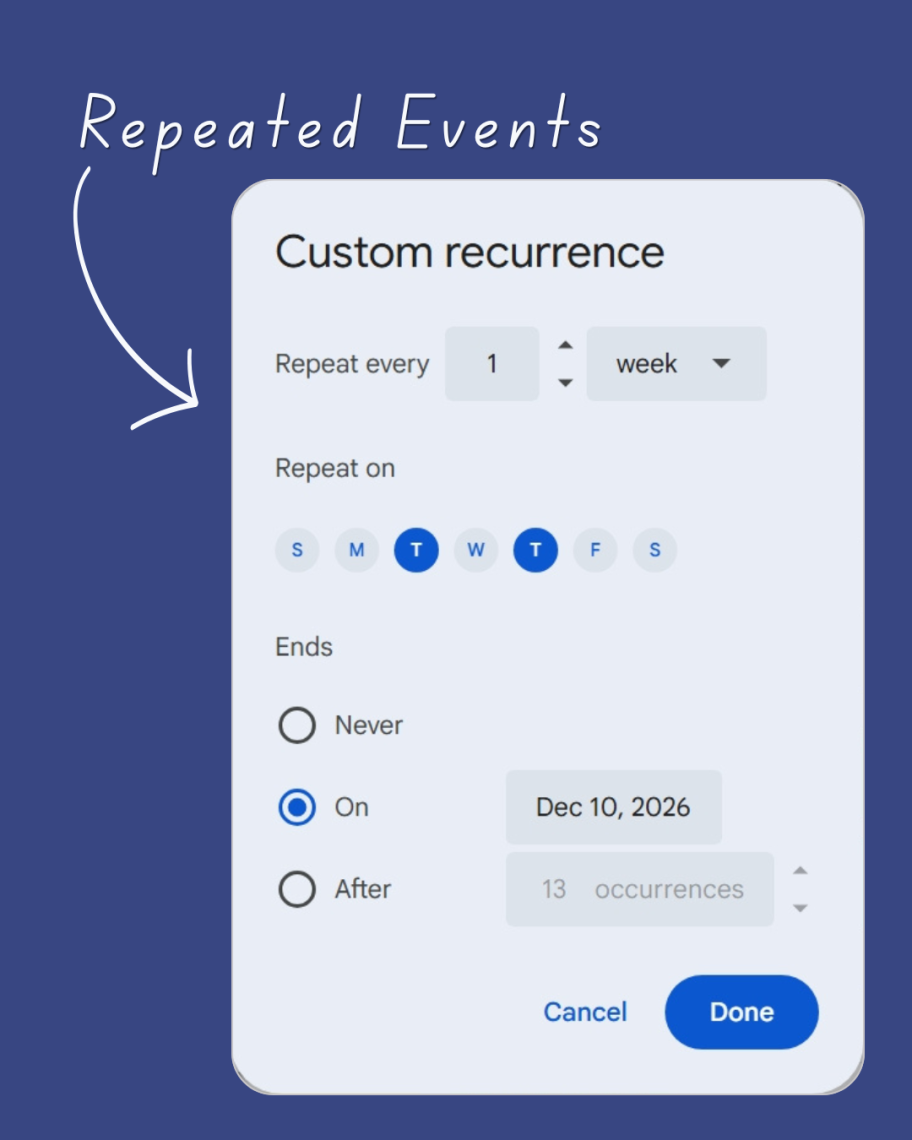
What’s worth mentioning is the “custom recurrence” feature! I use this so that my schedule appears the same for the entire semester. After you’ve added the class, you won’t have to worry about adding it again. For example, if your class repeats on Tuesdays and Thursdays each week, you’ll select those days. You’ll also have the ability to pick the end date for the class, which would be the last day in the semester.
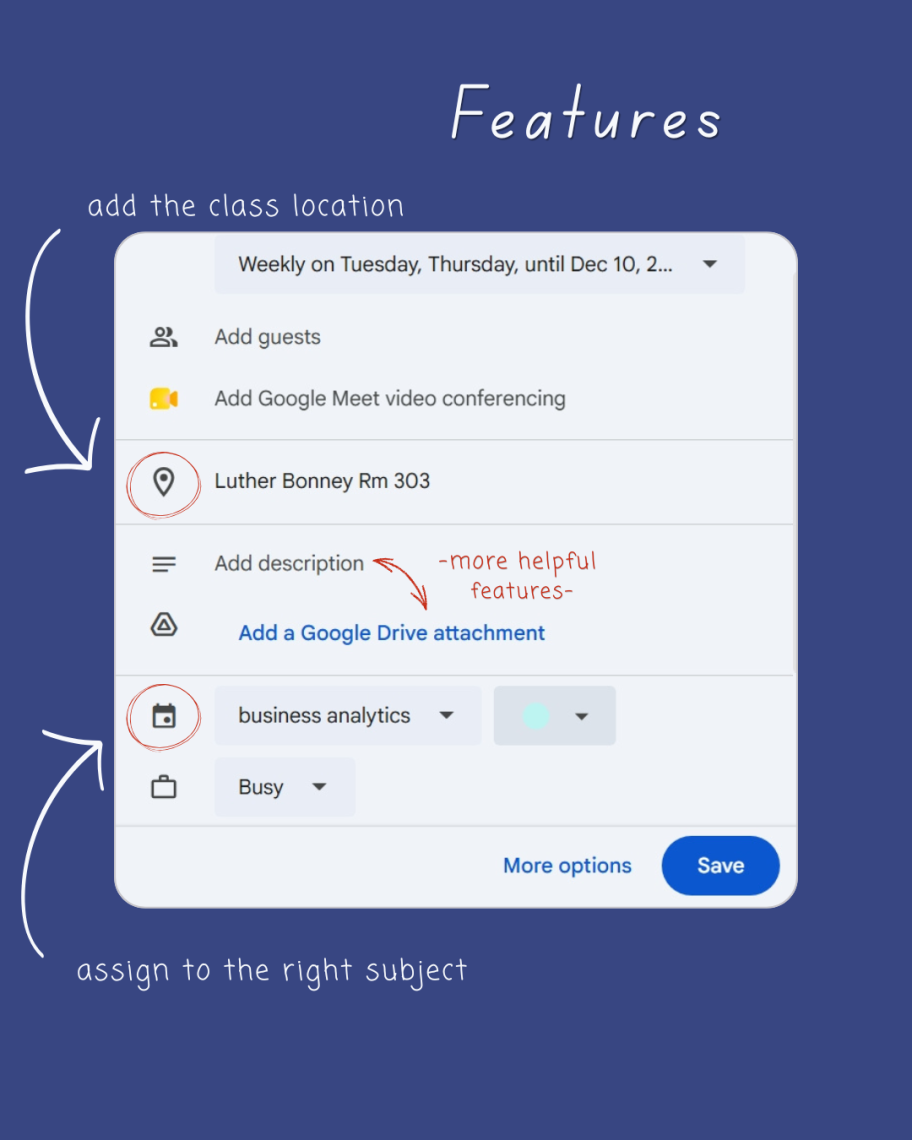
Okay, so remember all the new calendars we made in the beginning? Don’t forget to assign the event to the right subject when in this function! The color will automatically change to what you chose to correlate with the subject.
3.
What helped me during my first semester was adding the location straight into the event. So when I was walking to class, I could quickly peek at my phone and see the building and room number where the class took place. I highly recommend doing this! It’s much easier than filing through the schedule or syllabus online when you’re hustling to get to class.
4.
Another good resource and way to get the most out of Google Calendar is to add documents or notes to the event. Want to attach your syllabus to the schedule or notes from lecture that day? Add these by using the “add Google Drive attachment” or “add description” features!
5.
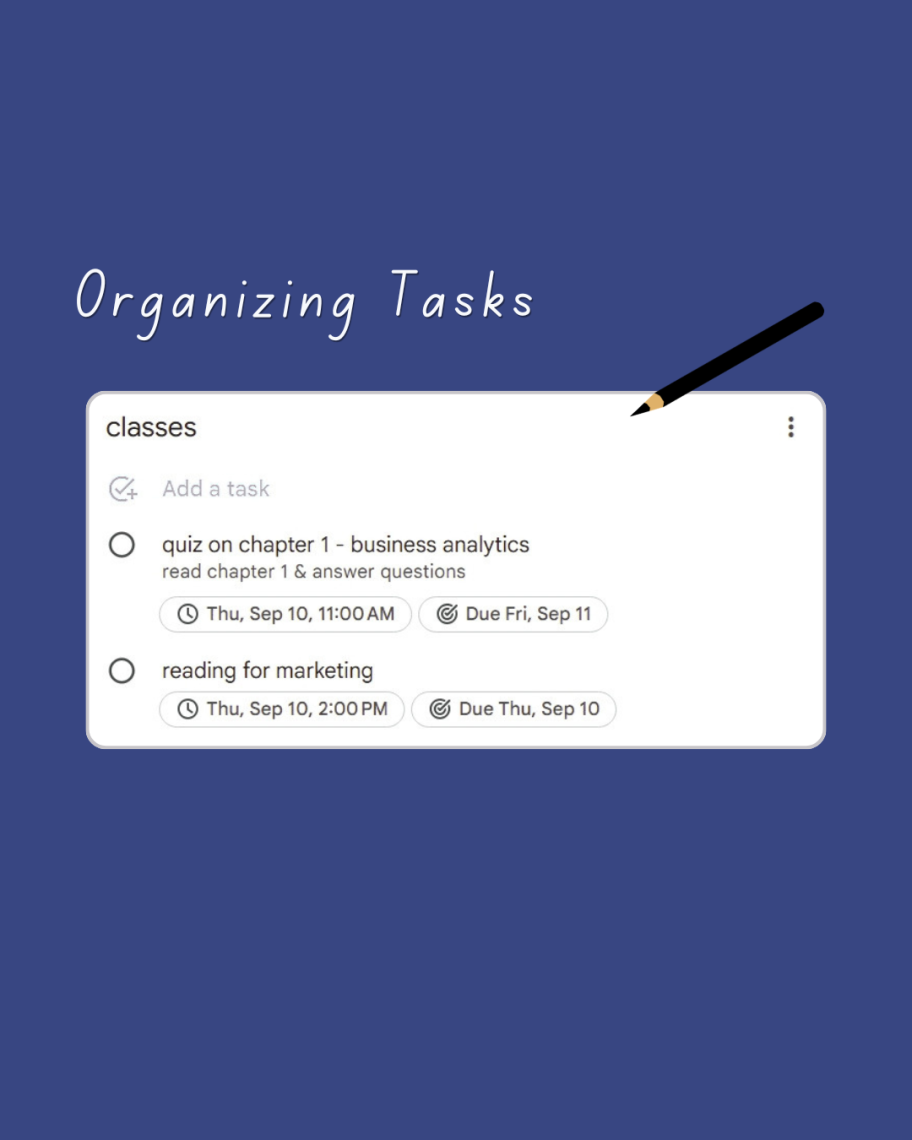
One way I like to keep track of tasks is to add them to my schedule using the “tasks” button. That way I know if I have an important deadline that week. I’ll see it every day when I open my calendar.
That’s pretty much it! You’ll repeat this process for all aspects of your schedule. It’s easy to make changes when something gets cancelled or moved.